|
<< Click to Display Table of Contents >> Weighing out a Truck that has weighed in |
  
|
|
<< Click to Display Table of Contents >> Weighing out a Truck that has weighed in |
|
If the Weighed In panel is not visible, click View > Panels > Weighed In to open it. The Weighed In panel is shown below.
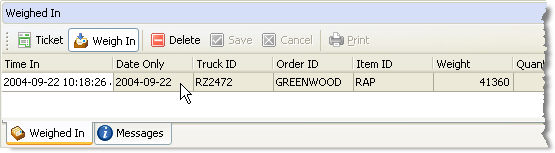
With the mouse, click on the row that contains the Truck ID that identifies the Truck you want to weigh out. In this example we will be weighing out Truck RZ2472.
If the row that contains the Truck ID is not already visible, you may need to use the scroll bar at the right of the panel to locate it. The scroll bar is only visible when more Trucks have weighed in than can be displayed on the Weighed In panel.
When you double-click on a row in the Weighed In panel, The Ticket panel (shown below) will automatically become visible (if it's not already) and the Truck ID prompt will become focused. The Truck ID, Order ID and Material ID values on the Ticket panel will match the corresponding values from the Weigh In panel. The example below shows the result of selecting the row shown in the screen shot above.
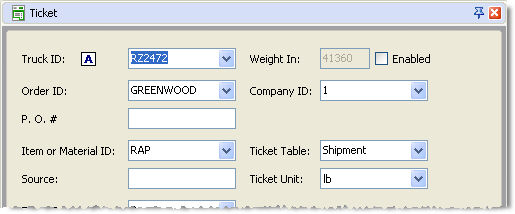
If you recorded incorrectly when the Truck was weighed in, it's not to late to make corrections before the transaction is completed. Any changes that you make will be used for the completed transaction and the old values will be discarded.
Weighing out a new Material
In the example we've used, the Material RAP will be a new Item for the Order GREENWOOD. For this reason, you will notice that the Ticket Table control is enabled which allows you to select whether the Material was Received or is being Shipped. |
If the information you have selected is correct, click Print to complete the transaction.
Introduction
In this example we will be completing a transaction for a Truck that was weighed in with a load of asphalt that is to be recycled. To complete the transaction, the Truck must be weighed out when it is empty.