|
<< Click to Display Table of Contents >> Configuring a Serial Port |
  
|
|
<< Click to Display Table of Contents >> Configuring a Serial Port |
|
Step 1 - Select a port
The first step is to select the serial port that you have connected the digital weight indicator to using the Name property. The drop down list will give you the option of selecting Not connected followed by a list of all serial ports that have been detected.
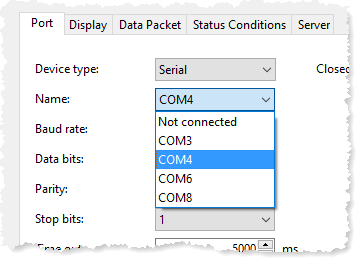
If the only item in the list is Not connected, there are no serial ports available on your PC. You can confirm this using Windows Device Manager.
Step 2 - Set the communication properties
The second step is to set communication properties: Baud rate, Data bits, Parity and Stop bits. These settings must match the settings on the digital weight indicator exactly or the computer and digital weight indicator will not communicate correctly.
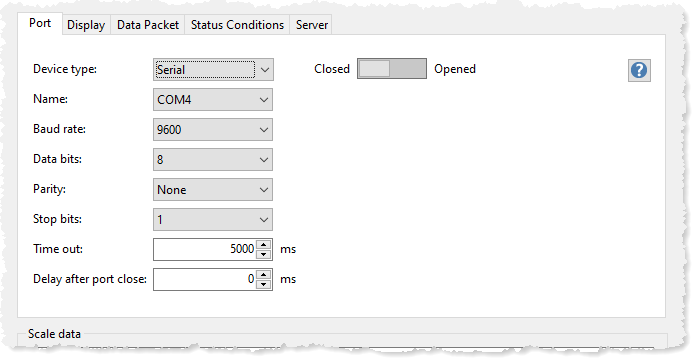
Time out |
This is an arbitrary amount that should not be set to less than twice the output rate of the digital weight indicator. The default is 5000ms or 5 seconds. If data are not received with in that time the display will be cleared. |
Delay after port close |
This parameter is useful in making sure that slow serial port hardware not opened and closed too quickly in succession which has been known to cause errors. |
Step 3 - Open the port
Once the port properties have been set (particularly the Port Name), we can test to if we are receiving any data from the digital weight indicator by toggling the Closed/Open switch to Open. If all goes well and the digital weight indicator is transmitting data something will appear in the Scale data control.
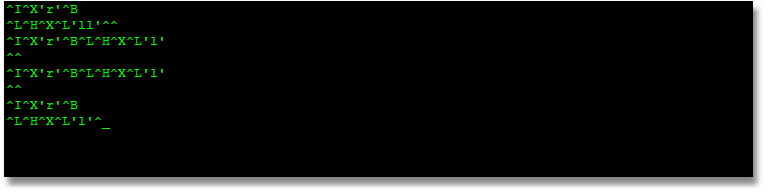
What appears in the image above may look like nonsense but it tell us two things:
| • | We have chosen the correct port |
| • | The digital weight indicator is sending data |
| • | One or more of the port properties are incorrect |
Not bad - if we saw nothing in the Scale data control that would be a real problem.
Step 4 - Correcting the communication properties
So, what do we do now? The first setting to try changing is the Baud rate setting. Once we get the Baud rate setting correct we are likely done. In the example above the Baud rate was set 14400. Most indicators will transmit data at 9600 baud or less so if you are experimenting try values at or below 9600 first:
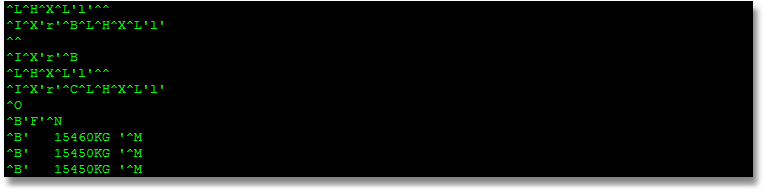
Perfect. The last 3 lines are legible and that's exactly what we want to see. Now we know the data packet begins with ^B, the scale weight is 15450 and the data packet ends with ^M.
Now we can go the the data packet tab and set up the data packet.