|
<< Click to Display Table of Contents >> Setting up a Ticket Printer |
  
|
|
<< Click to Display Table of Contents >> Setting up a Ticket Printer |
|
This document describes how to setup the printer that will be used to print Tickets.
Prior to setting up your Ticket Printer, you must:
|
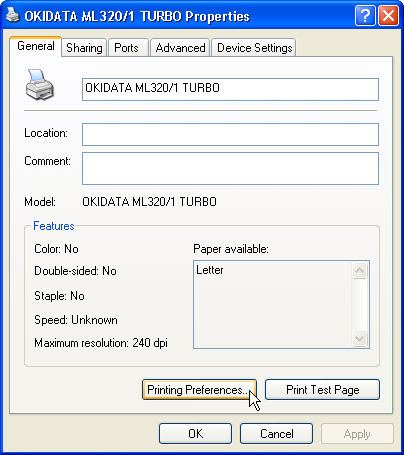
Click Start > Printer and Faxes to open the Printers and Faxes folder. Select your printer (click it once), then click File > Properties to open the printer's Properties dialog. The Properties dialog for the Okidata ML320 Turbo printer is shown below.
Click the Printing Preferences button. The Printing Preferences Dialog is shown below.
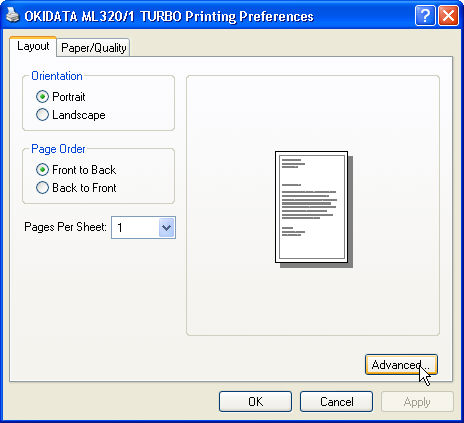
Click the Advanced button on either the Layout or Paper/Quality tabs to open the Advanced Options dialog. The Advanced button exists on both tabs.
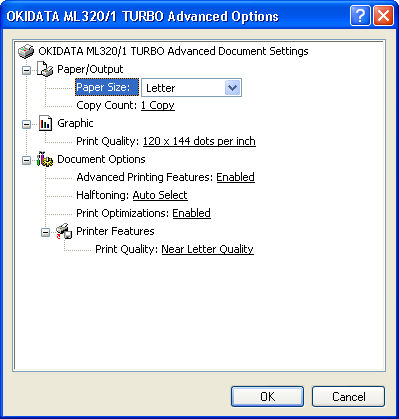
Click the arrow to the right of the Paper Size combo box control and select Custom.

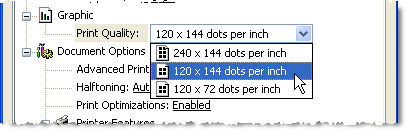
Click the arrow to the right of the Print Quality combo box control and select 120 x 144 dots per inch.
Click the OK button to close the Advanced Options dialog. Click the OK button to close the Printing Preferences dialog.
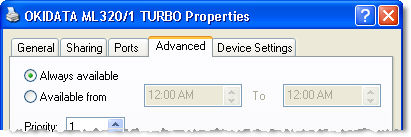
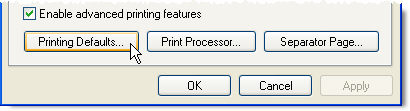
From the Properties dialog, Click the Advanced tab. Click the Printing Defaults button to open the Printing Defaults dialog.
Click the Advanced button on either the Layout or Paper/Quality tabs to open the Advanced Options dialog. Click the arrow to the right of the Paper Size combo box control and select Custom.
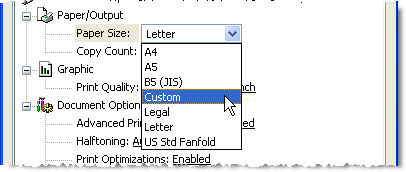
Click the arrow to the right of the Print Quality combo box control and select 120 x 144 dots per inch.
Click the OK button to close the Advanced Options dialog. Click the OK button to close the Printing Defaults dialog.
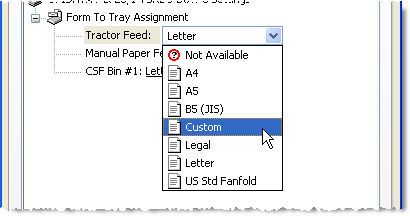
From the Properties dialog, Click the Device Settings tab.
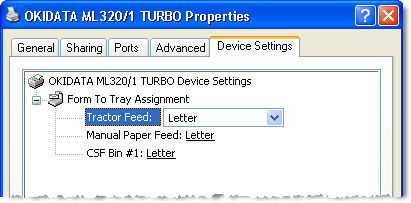
Change the Tractor Feed, Manual Paper Feed and CSF Bin #1 settings in the Form to Tray Assignment group to Custom.
Click OK on the Printer Properties dialog to save the changes and close the Properties dialog.